try and fucking bánh this.


bánh mì


the only real argument for colonialism

– calvin trillan

  • you are probably sick of looking up a recipe and having to endlessly scroll down some dickhead’s life story on a blog, endlessly accepting cookies that you cant even eat. we think there are some things you should know about this sandwich, but it will be short and sweet.
  • throughout history the french have been known for two things: bread, and being dickheads. some shit went down… time went by, cultures mixed, here we are.

  • bánh mì‘ literally means ‘bread’ in vietnamese. so as long as you have kept up with our other posts and have some bread in hand, you are ready for a good time.

  • different areas over time developed different flavour combinations and ingredients (from pâté to fish) but there are a few recurring ingredients that are considered a staple.

  • here is our version.

pickled veg

  • classically carrot & daikon. however you can switch it up a little, here we have some carrot, red onion and radish.
  • cold & crunchy. we rubbed these with some sugar and salt, covered with brown rice vinegar and set in the fridge. keep it simple, dont stress yourself.

fresh chillies

  • next, slice some chillies or jalapeños. cover in lime juice, set aside.

mayonnaise.

  • if you dont like it, make something else. this is a base requirement.

  • hellmans is good, making your own is better. it is very easy. we will drop a guide on how do this at home.

  • here we used rice vinegar, and didn’t wipe the bowl before the photo, because why would we?

fish sauce

  • you are at home, staring outside at the rain, wishing you could experience something even slightly culturally stimulating. fish sauce will transport you to the fucking streets of saigon, dont be scared.
  • here we smashed some garlic cloves, added a fat splash of fish sauce and more lime juice. you can use a blender if you have one, but this is more fun.

protein

  • pork is what you want here. you could use a variety of cold-cuts, grilled pork or anything really. char sui is a popular go-to.
  • we wanted porchetta, so we made porchetta.

  • we used a small portion of pork shoulder, stuffed with herbs, garlic & fennel. then forgot about it in the oven for a long time.
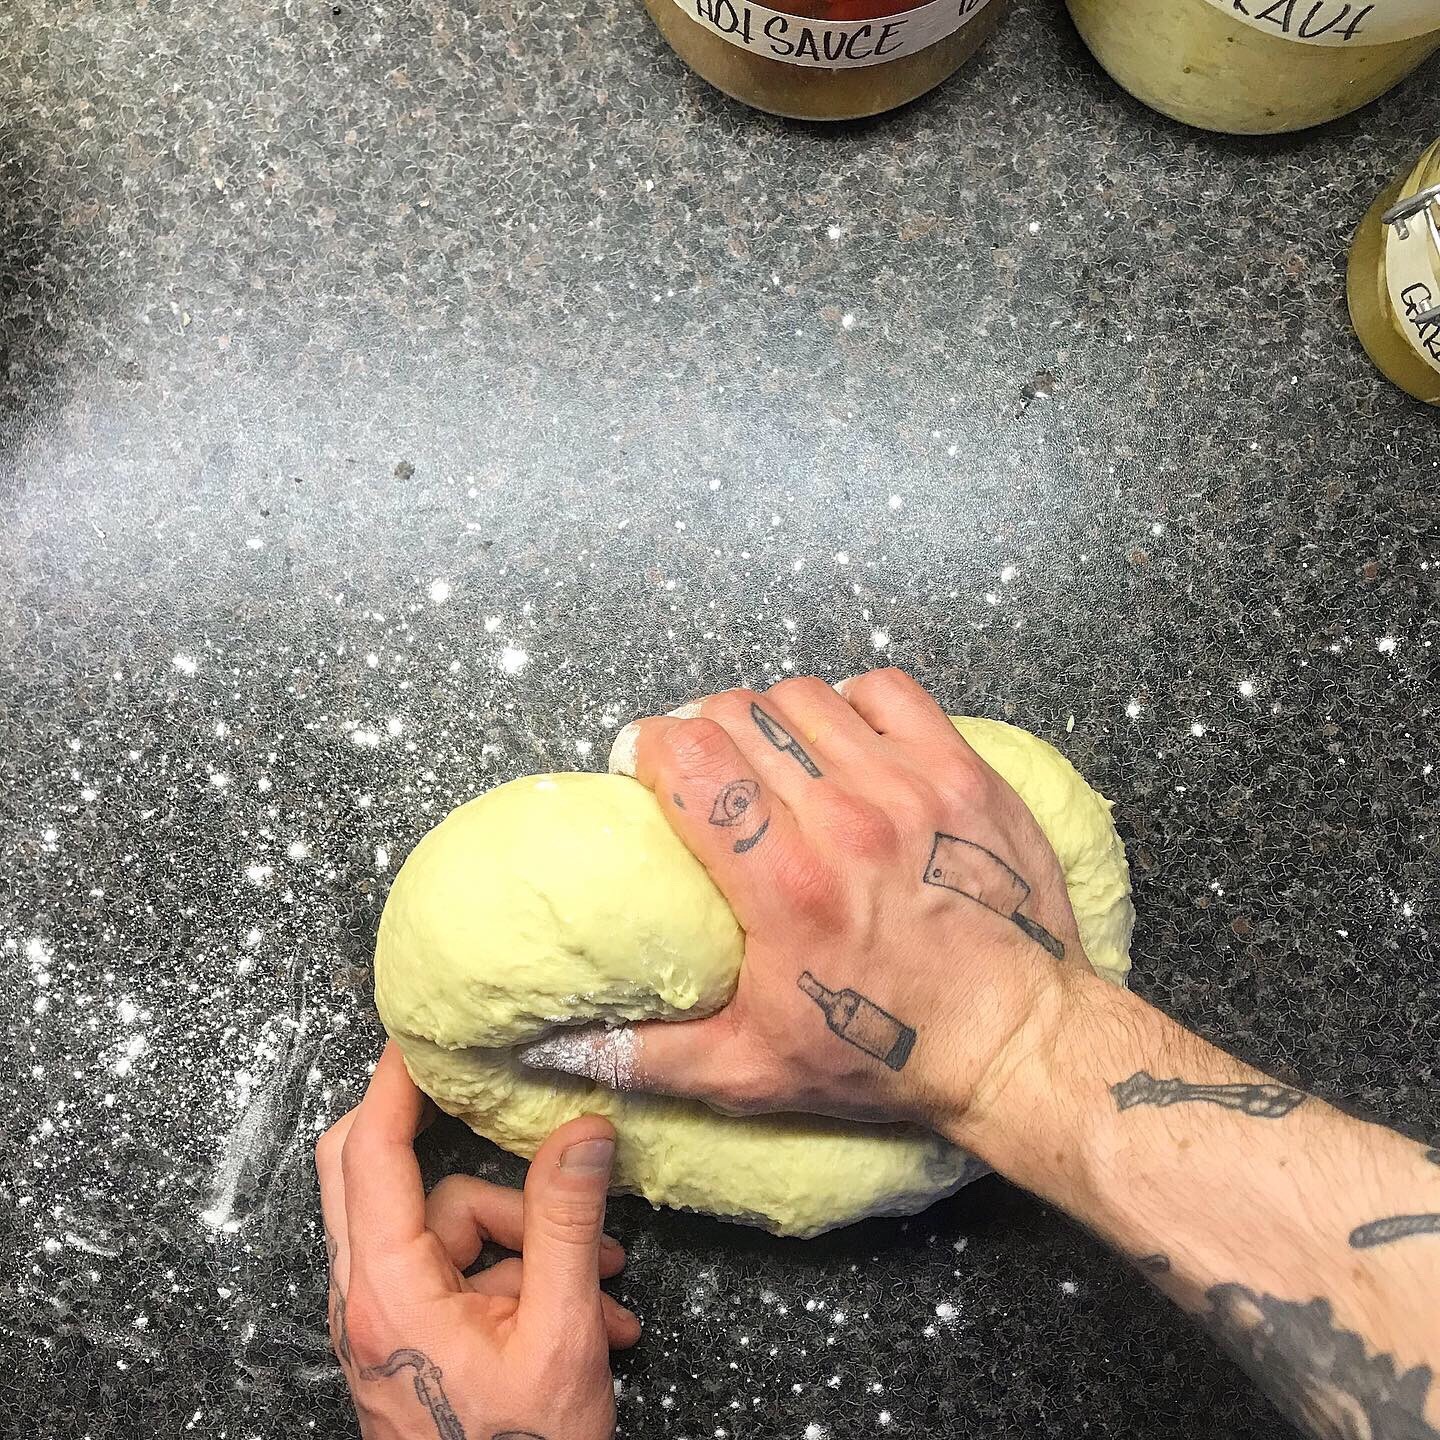
baguette

  • the heavy french influence comes mainly through the use of the baguette. buy them locally for next to nothing, or make them at home. we will drop a sourdough baguette recipe soon.
  • gather everything you have prepared. toast your baguettes in the oven until crisp and browned, slice in half.

  • spread obscene amounts of mayo on both sides.

  • pick coriander leaves from the stem. if you are one of those people who cant enjoy coriander… shit one. your experience will be inferior. don’t you dare throw away them stems (recipe drop soon: candied coriander stem).

  • begin stacking.

  • slice in half.

  • eat it. colonise it. whatever you want, as long as its inside bread… its a bánh mì.

big boy bread: sourdough

“there are only two kinds of bread in the world: bread that hands have made, and bread that hands have not”

time to stop playin’

  • we hope somewhere between the enthralling daily adventure to the shops, and your 4th glass of vino on a tuesday night, you at least had a few attempts at making some form of bread during this free time.

  • if you have grown from somewhere between “in the bin before anyone sees it” to “fuck this is actually alright” (a right of passage) and want to get on top of your game even further, fear not, we got you covered right here.

  • this will be an advanced guide to baking a loaf of sourdough at home, if you are new to this, please see the previous posts on how to create your own starter culture and develop to the stage of baking a loaf, then come back here. or don’t, whatever level you feel is good for your enjoyment at home, do that.

bakers percentages

  • calculating percentages for baking is slightly different than the standard ‘percentage’ you are used to.
  • every ingredient is expressed as a percentage of the total flour weight. not the total weight of the dough. the flour weight is always expressed at 100%.

  • for example:

  • 100g flour
  • 60g water
  • 6 salt

  • to make this easy, our 100% is based off 100g flour. added together this dough would weigh 166g, but that is not our base.
  • 60g of water, as a percentage of 100g flour, is 60%. this makes our dough 60% hydrated.
  • 6g of salt, as a percentage of 100g flour, would be 6%. (an example, dont do this).
  • if this seems confusing as it is based off ‘100’. take 250g flour, 60% of 250 would be 150. so adding 150g water would make your dough 60% hydrated.

autolyse

  • with most things in life, there are a few tricks that get you through it. bread is no different.

  • ‘autolyse’ or ‘autolysis’ is just a fancy term for hydrating flour, mixing your flour and water together before adding any additional ingredients (starter & salt). however don’t let this pseudonym over-simply things, this is an important process which is vastly overlooked.

  • when your flour and water are mixed until no dry flour remains, and you let it rest for a small period of time, you will see the difference. your dough will be smoother and more elastic, have a better crumb, and generally just be way fuckin better.

whats goin on’

  • when the flour absorbs the water and is fully hydrated, enzymes in the flour stimulate proteins to begin gluten development. at the same time, other enzymes are breaking down starch into simple sugars which feed the yeast during bulk proofing.

  • this is happening before any kneading is done to your dough, preventing any chance of an over oxidised dough, which may be grim for the colour, flavour and texture of your beautiful loaf that you so wish for.

  • bakers love fancy words, it makes you feel good. ‘levain’ is one of these words.

  • a ‘levain’ is your sourdough starter. it is the rising agent for your dough and what you have been babysitting for weeks now, ready to be let out to play.

  • there are endless techniques and timelines used by bakers from everywhere, once you learn the behaviours and temperatures of your dough and yeast, with what you have at home, a natural schedule that suits your routine will fall into place. in winter, fermentation will be slower as it will be colder, and in summer, you will see a rapid increase of activity due to warmer environments.

  • learning to adapt to the ranging temperatures and conditions, and knowing what to do to manipulate this as best you can, is the ‘fun’ part. well, until your tearing into a still-warm loaf with your hands, raining butter and sea salt on that bitch with your boys at 2am on a saturday night cause you forgot to make a levain early enough that day.
  • your timeline will be based upon your conditions at home, however the processes remain the same. below is a process breakdown that works.

autolyse

levain

salt

stretch & fold

bulk ferment

shape

proof

bake

  • autolyse your dough ideally between 2 and 4 hours. however even a 15 minute autolyse makes a difference if you are pushed for time, we’re in the big leagues now.

  • we are not getting into the activity of your starter here. we are assuming your starter is active and ready for its big night out, if not, check out our starter maintenance post. some sort of tech whizz would have the link to that post right here, too bad you are stuck with a baker.

  • we probably should have mentioned this earlier, but you should always read something through fully before you try and follow the instructions. if you have, fair play, if not, lesson learnt. when autolysing your dough, save around 5% of your water on the side, so you can use this to help incorporate your levain and salt when needed.

  • we will release a another advanced guide into the world of different levain percentages, but for now we assume you followed our sourdough guide and have an active levain of 100% hydration (equal parts flour and water).

  • the bakers percentage of our levain is 20%.

  • using a splash of this reserved water, dimple your levain into your hydrated dough, pressing it in with your fingers and working it together (see photo above somewhere).

  • depending on how wet your dough is, it will take different amounts of time to come together. as your knowledge and skills grow, you can experiment more with higher hydrated dough, your hands and eyes will let you know when the dough is ready.

  • a famous technique is known as the rubaud method . this involves ‘scooping’ the dough underneath and stretching and pulling the dough until it becomes extensible and smooth.

  • let the dough rest for 30 minutes, covered with a tea towel or some clingfilm.

  • next, you want to add your salt.

  • apply the salt the same way you incorporated your levain, using your fingertips and remaining reserved water to bring together, before applying the rubaud method (see photo below)*

  • *advanced method: play ‘stairway to heaven’ , do not stop mixing until the song is done, and we guarantee your dough is perfect.

  • in the photo above, i know what you might be thinking. “look at all that dough on the side of the bowl” well you probably are not thinking that, but were addressing it incase any real bakers are reading this, we know our shit, and you will too soon enough. see photo below (the power of led zeppelin).

  • once your dough has come together, you want to begin the ‘stretch & folds’.

  • this is a technique used to increase gluten strength and structure to your dough. you want to grab one side of your dough, stretch it gently until it feels resistant, then fold it over your dough (use wet hands to prevent sticking). you want to perform this on three sides of the dough, until it has all been folded over itself. let your dough rest for 30 minutes in a warm environment.*
  • *a warm environment. ideally 22-24 degrees, which you use as a base for fermentation (for your starter, dough, anything else).

  • after 30 minutes, you will probably have noticed the dough has deflated and flattened a little. you want to perform the next stretch & fold at a 30 minute interval, before returning to the warm environment, and performing an additional stretch and fold after 45 minutes, or enough times until your dough holds a partial rounded shape after a 30 minute rest.

  • when the shape holds slightly, it is time for your bulk ferment.

  • bulk fermenting, is simply that. it is fermenting your dough, in bulk form (one single mass) before you decide to divide it into smaller loaves, rolls, baguettes, or leave it whole for a big daddy loaf for sunday brunch.

  • you want to bulk ferment 2-5 hours, depending as always on the warmth of your resting environment. when the bulk ferment is complete, your dough will have flattened a little but still have a faint rounded edge in your bowl. now it is time to shape it into a loaf.

  • there are some other steps in the advanced techniques of bread making , such as ‘lamination’ and ‘pre-shaping’, which we do perform regularly with great results, but with the process we have applied here, you still end up with a seriously bangin’ loaf.
  • tip your dough onto a lightly floured surface. flip your dough with a dough scraper (get one) or something flat until the floured side is face down.

  • now we begin creating the base shape of our loaf. we cant pretend to know the best technique for doing this, as there are hundreds. but incorporating air and structure in this step is important, and this technique works damn fuckin’ good. alternatively, get onto YouTube and learn whatever technique looks the most fun and effective for you.

  • fold one side of your dough over onto the middle, and then the opposite side over this. then fold the top halfway down your dough. then we begin ‘stitching’ which is stretching opposite segments of the dough over itself (like a stitch). see photo below. flip your dough, and seal the edges with your fingers.

  • now it is time for proofing.

  • your beautifully shaped dough needs somewhere to relax. us fancy folk use something called a ‘banneton’ or a ‘proofing basket’ which is a basket (made of cane or rattan). this enables your dough to proof ‘upwards’ rather than out, giving you a nice, high-rising light loaf. alternatively at home you can use a mixing bowl lined with a linen tea towel (use linen as it wont stick, fuck cotton).
  • liberally flour your banneton/cloth-lined bowl. if you can get your hands on some, use rice flour as it will ensure even further your dough does not stick.

  • *important as fuck. flip your shaped loaf upside down, so the seam you have ‘stitched’ is facing upwards. lift gently from underneath to not compromise the shape and all of the air you have so artfully incorporated, and place into your floured container of choice. (below)

  • now we wait.
  • let your dough proof in the banneton for around 15 minutes at room temperature, before covering with a towel, or wrapping in film and placing in a cold fridge. you can proof your dough in the same warm environment and have it baked within hours, however a cold fermentation overnight has many more benefits.

retarding

:retard (verb)

– a delay or hold back in terms of progress or development.

  • we know what you are thinking, but don’t be a dick. ‘retarding’ is the process of slowing down fermentation in your dough, to increase depth of flavour and texture.

  • as your dough rests, in a cold environment, the yeast bacteria produce acetic and lactic acids, which produces a richer and more complex flavour to your bread.

  • you want your fridge temperature to be between 2-4 degrees, a little more locked in than 0-5. (for the serious nerds, the cooling rate of your fridge can come into play here, but if you are that clued in to cooling rates of fridges in regards to yeast fermentation, you should be way fuckin smarter than us so keep on truckin).

  • cut a square of baking paper, wider than your dough.

  • place this piece of paper on top of your banneton, and flip onto a flat surface.

  • now we slice. we use a lame which means ‘blade’ in french. which is simply a flexible razorblade attached to a fancy wooden handle, to make it seem less like paulie slicing garlic in goodfellas. (photo above).

  • slashing the dough lets you control where the steam escapes, which will happen naturally, but this enables you to be in control of the aesthetic shape of the loaf, aswell as ensuring an even steam distribution.

we like it hot

  • you want a hot oven. you can bake this dough at varied temperatures, but we personally enjoy the primal kiss of a wood fire, obviously you are not going to do that just yet, so setting your oven to 260, or as hot as it can get, is a good start.

  • let your oven heat up for around an hour, until screaming hot.

  • steam is your friend. when the surface of the dough gets hot enough in a steamed environment, the starches slowly start absorbing moisture, until it becomes so saturated that it liquefies, creating a brittle and glossy crust.

  • there are many methods to create steam in your oven (you might be middle-class enough to have a steam option built-in to your home oven) but the two main approaches to home baking are:

  • a dutch oven. a lidded cast-iron pot.
  • a tray of ice or boiling water placed underneath the dough.

  • you want steam present for the first 10-20 minutes, to form the basis of your crust. after this time, reduce the temperature of your oven by around 10% (if your oven is at 260, reduce to 230, or use your fancy iphone to calculate 90% of whatever your oven is at)

  • here comes the most scientific, the most technical part of the whole process, you cannot afford to fuck up this meticulous process:

  • tap the bottom of the loaf with your hand.

  • does it sound hollow? if so, throw her on a wire rack to cool and crack the champagne baby its christmas. if not? shit one, try again from the beginning.

  • a good baker will tell you to wait until it is fully cooled before slicing , but a great baker knows the urge is too hard to resist.

  • you have spent long hours, days & weeks caring for this starter culture, and the entire process of creating a loaf, so if you want to slice that bread straight down the middle still-warm, get a shot for the gram to show off and then indulge without patience or judgement, you go right ahead and do that.

  • such is the beauty of life, bread included;
  • you can do whatever the fuck you want.

get baked.


the virgin


if you want some bread bitch you best be in a magazine” – PIMP C

  • you are probably impatient as hell at this point to actually have some bread in front of you. all this ‘feeding’ and mild annoyance of having to deal with this watery, yeasty shit in a jar is probably getting a little dull. fear not, time to get on it.
  • if you think your starter may not be alive or ‘active’ enough, shoot us a DM on instagram (@mischief.48) , but if you have followed the timeline and she is looking fine this evening, its about time you had something to eat.

  • this first recipe, is extremely simple. an easy introduction that requires minimal effort, but produces a bread bangin’ enough to please your tastebuds, and if you are so inclined, a few instagram likes.

the easy loaf

  • 100g sourdough ‘starter’
  • 500g strong bread flour
  • 300g water, lukewarm.
  • 1 bump sea salt (1 tsp) * see below

.

  • mix the flour, water, sourdough starter and salt together in a mixing bowl, you can start with a wooden spoon or spatula, but when it begins to come together and become more homogeneous (all the same texture) is when the fun begins.

  • lightly flour your work surface/ counter-top/ chopping board. tip your dough from the bowl, and start kneading the dough. we will not bother exploring the basic principles of what ‘kneading’ is, we have shit to do, but a quick google if you are in the dark will get you there. you want to knead the dough until some tension forms on the outside of the dough, becoming smoother, and it starts holding its shape in ‘ball’ form.
  • lightly oil a clean mixing bowl, and place dough inside. cover with cling film or a damp tea towel, and leave somewhere warm or at room temperature, such as a high shelf in the kitchen or inside your grow tent.

  • rest for around 1-2 hours, or until roughly doubled in size.

  • when doubled, tip onto a clean work surface and knock back (removing air) from the dough, a punch or two will do. at this point you can cut this dough down the middle and make two smaller loaves, or go for the big daddy.
  • place a clean tea towel in the mixing bowl you used to rest the dough, line it heavily with flour. (or use a banneton, your next level up).
  • shape your dough back into a ball (or stitch and fold, which we will explore soon), and place upside down into the floured cloth in the bowl/banneton. cover with film and leave back in warm place for 2-3 hours or in the fridge overnight. this is called ‘proofing’ the dough, letting it rest and settle, which will be explored in further detail in the advanced recipe (coming soon) or… just look it up.
  • pre-heat your oven to 230 degrees, or 210 fan oven, if you want the fahrenheit temperature, fuck off.

  • tip your dough onto a baking tray, lined with baking paper. make a slash on top of the bread if you want that gangster ‘open ear’ sourdough, or don’t if you want it to burst in natural ways, you do you.

  • you want steam. place a small tray of boiling water in the bottom of your oven, failing that chuck in some ice cubes or pour some of your cold beer onto the bottom of the oven (not recommended).

  • bake for 30-40 minutes, until a desired crust has formed and sounds hollow when tapped on the bottom.

  • remove from oven and place on a wire rack. you most definitely should let it cool before you slice it, but there is absolutely no chance you are going to do that so why bother trying to baby you, get a whack of butter at the ready, make it rain with some sea salt and live your damn life.

“all sorrows are less with bread” – miguel de cervantes saavedra.

  • an advanced recipe is dropping soon for those keen to step up their game and hit that ‘open crumb’ bread that they can show off, for now, enjoy your first home baked sourdough and heres a poem by DMX:

go hard, getting busy wit it,

but I got such a good heart,

that i’ll make the motherfucker wonder if he did it.

damn right, and i’ll do it again,

’cause I am right so I gots to win

break bread with the enemy,

but no matter how many cats I break bread with, i’ll break who you sendin’ me.

sourdough, real talk.


technical info / nerd shit


you should know whats up

sourdough.

  • when you start looking into the science of anything really, it gets a bit mad. but if you are interested in mastering your craft, its useful to know some hard facts and how things work.

fermentation.

  • yeast and bacteria are already present in the air & flour.

as wheat flour hydrates, the enzyme amylase breaks down the carbohydrates into sugars, which are then broken down further into glucose and fructose, which are food for the wild yeast to begin fermentation. there are two types of fermentation here, aerobic and anaerobic.

aerobic.

  • This type of fermentation produces carbon dioxide, which is what makes the starter bubble and full of life.

anaerobic

  • This produces alcohol, which separates to the top of the starter, sometimes called ‘hooch’.

*mixing your starter well when feeding will help aerate it and dissipate the co2 on the surface.

**fun fact: yeast fermentation also produces traces of ‘glutamate’, a component of ‘MSG’, adding a more savory depth of flavor.

  • ‘lactobacillus brevis’ is the chemical name of the lactic acid present during this type of fermentation. This is what creates the acidic note to your starter, while the yeast provides the leavening action for the dough.
  • the bacteria consume glucose and produce lactic acid, so it generally has a lower ‘ph’ than bread made with commercial yeast. (it creates an environment unfriendly to pathogenic bacteria).

*chlorinated tap water should be avoided when possible, it will inhibit yeast action.

  • unbleached flour provides a better raw material for a starter. for example rye flour contains more nutrients and sugars for the yeast to feed on, and this flour can be phased out later.
  • when creating your starter, mix vigorously or blend to encourage aerobic fermentation.
  • 20-22 degrees is the ideal storage temperature for your starter to thrive.

*starter can be frozen or dehydrated for storage, and can be revived at room temperature with regular feeding.

autolysing

  • a fancy word for hydrating your flour, before adding your starter/yeast. an important step for incorporating air into your bread, but you only really need to know the official word if you want to show off on instagram that you are baking all sorts of delicious hydrated goods and shit.
  • this involves mixing your flour and water together and letting it rest, before adding your leavening agent and salt.
    • flour absorbs water, activating enzymes that stimulate proteins to begin gluten development. 
    • starch is also converting to sugar that will feed the yeast during the bulk proof. *this will reduce kneading time, and prevents over oxidized dough that can affect colour, flavor and texture.
  • if you have a higher percentage of whole grain flour = longer rest time.

*when using stoneground flour, be aware of extra moisture, coupled with larger microscopic starch, which has a slower hydration, increasing more gluten and bonds


hit us up with any issues


bread&broth.


chapter one: bread.


sourdough bread.

bread is one of the most ancient foods in history. creating bread from a culture of wild yeast has been done for thousands of years, but it lost its touch to commercially produced bread, full of preservatives and lacking many of the nutrients and flavours that made bread so damn good.

so that is why we are here. to take it back to basics. we will guide you through cultivating your own sourdough starter and maintaining it at home, to baking different loaves and various other goddamn delicious shit.

get up, grab a bag of flour, pick your favourite spoon, crack open a bottle of merlot and get that bread $.


your own starter: day one


sourdough bread, day one.

an active culture of wild yeast, which under your control can produce serious baked goods.

you need:

• (1) a glass jar, kilner brand preferably. when working with fermentation, good quality is essential.

• (2) water, a spoon/spatula, kitchen scales, a pen and paper, and flour.

• (3) weigh your jar without the lid.

• (4) write down the weight of the jar in a notebook, tell it to siri, or text it to your ma, it will make your life easier to know it.

• (5) flour. important. you cannot use bleached flour to create a sourdough culture, some bacteria will need to come from the grain itself, get yourself some wholewheat, rye, strong bread flour or unbleached white flour to kickstart things, different flours can be phased out later.

>weigh out 50g of your flour, and add it to your jar. *write this in notebook

• (6) weigh 75g of warm water, if you want to nerd out try and warm your water to around 29 degrees, but it’s not necessary at this stage for you at home. * write in notebook

• (7) pour the 75g of warm water into the jar of flour.

• (8) mix vigorously, preferably with a rubber spatula, a spoon will work if you are careful, I use this spoon because it’s sick af. mixing vigorously helps aerate your starter and get things moving

. • (9) a good jar comes into play here. you need a loose fitting lid, as the fermentation process will release gas which may pop, and you don’t want to be cleaning that up hangin on a Sunday morning.

• (10) screw or close the lid loosely, and place somewhere at room temperature, not too warm, for 24 hours. many factors such as bubbles, smell, alcohol and observing how your culture reacts is all coming soon, this is a simple introduction to get things going for you at home. tomorrow we will explore the first ‘feeding’ of your starter, stay tuned. slide into our dm’s with any deeper questions about this, or life in general.


feeding schedule


staying alive


sourdough feeding schedule

day 1.

creating your starter. weigh your jar empty without the lid, note it.

  • 50g flour. (wholegrain, rye, strong bread flour, unbleached flour)
  • 75g water, warm. (ideally 29 degrees C)

mix vigorously until no dry flour remains, leave for 24hrs after every feeding.

day 2.

the first feed.

  • 30g ‘mature’ starter. (jar weight +30g total) discard the remaining starter.
  • 50g flour.
  • 60g water, warm (29 degrees).

day 3.

  • feeding is the same as day 2.

day 4.

now we reduce the water ratio slightly.

  • 30g ‘mature’ starter.
  • 50g flour.
  • 50g water, warm. (29 degrees)

day 5.

  • feeding is the same as day 4.

day 6.

now we reduce the starter slightly.

  • 25g ‘mature’ starter.
  • 50g flour.
  • 50g water

day 7.

baby we did it. this is your last feeding before its ready to use to bake some bread. this can also be used as your maintenance feeding going forward, depending on how often you plan on baking.

  • 15g ‘mature’ starter.
  • 50g flour.
  • 50g water, warm (29 degrees).

if you plan to be baking and slinging bread quite regularly, keeping your culture at room temperature (around 22-24 degrees) is a good idea. in colder environments there is a slower speed of fermentation so you may need to wait longer in between feeds, but its totally fine to pop it in the fridge and feed it every week or so, we understand people get busy, its all good. but it is about learning to observe how your personal culture is reacting to its environment and reading the signs as to what it needs, and when, which will come in time.

if you require any more information or are having problems about your starter, slide into our DMs on instagram.

.

.

sourdough, day two.


feeding


24h.

sourdough, day two.

its been 24hrs since you mixed your starter culture, time to take a look. smell and sight are your tools to learning how your culture behaves, and you will learn the reactions of your own starter depending on the conditions it lives in, such as the temperature of where you store it. we now ‘feed’ the culture on a regular basis to build activity and help fermentation.

  • (1) take a look. is there any bubbles? if so, you are ballin. if not, don’t worry at all, you will see some activity very soon if you follow these steps correctly. 

  • smell your starter, it may still smell like ‘wet flour’ but soon the aromas of fermentation will appear, with sour, yeasty and alcoholic notes, which is your culture indicating to you what it needs, and we will learn how to read these signs along the way, for now just mentally clock or write down (good habit) the general smell.

  • (2) weight out 30g of your starter mix, we call this the ‘mature’ starter as the bacteria has been at work developing, and we want to keep this moving. if you recorded the weight of your jar, you can add 30g on to the total weight, and leave that much remaining starter in the jar, I will post additional photos of this method. i like to mix mine in a bowl, and clean the jar before placing back inside, it’s a good habit and looks way fuckin cooler in your kitchen when it rises. the remaining starter mix after taking 30g must be discarded at this stage, as your culture develops you can use this excess starter for many things which we will explore, but at this building stage it’s better to get rid of it.

  • (3) weigh 60g of warm water and add to your starter. it’s a good idea to add your water before the flour and give it a quick mix, it just makes it easier, real talk.

  • (4) add 50g of your flour with a designer spoon. 

  • (5) mix her up, treat her well.

  • (6) when no dry flour remains and everything is mixed evenly, bang you are done for today.

  • (7) add back to your cleaned jar if you removed, and/or close the lid of your jar, and throw back in that room temp spot which will be its home for another 24 hours. 

  • this is kept as simple as possible to help you get things poppin at home, but if you want more info on some technicalities, hit us up.
  • we will post a feeding schedule for the first week which you can refer to if your timeline isn’t the same as ours here, shit happens and people are busy, we get it, it’s all good baby. Hit us up or tag us in some photos of your starter / bread / dog, we’re always down for that.